Showing posts with label diy. Show all posts

Monday, September 2, 2013

DIY Reusable Chalkboard Banner

Hello awesome people!
 
As you can see in this postI was honored to host a woodland-themed baby shower at my home for my super-cool cousin, K.
 
I used some items that were in my craft closet and made this customizable banner.
diy, banner, chalkboard, chalk, baby shower, twine, decorations, inexpensive


This is quite quick & easy, and the best part: it's reusable.
 

Tutorial Starts Here

The items you'll need:
supplies, diy, chalkboard banner, cake circles, cake rounds, paint, twine

--8 inch cake circles
--chalkboard paint
--paint brush (sponge type works best)
--twine
--scotch tape
--chalk
 
Step 1: Paint one side of each cake circle with blackboard paint. Make sure to get the edges.
Don't be afraid to put a thick coat; blackboard paint works better in thick layers.
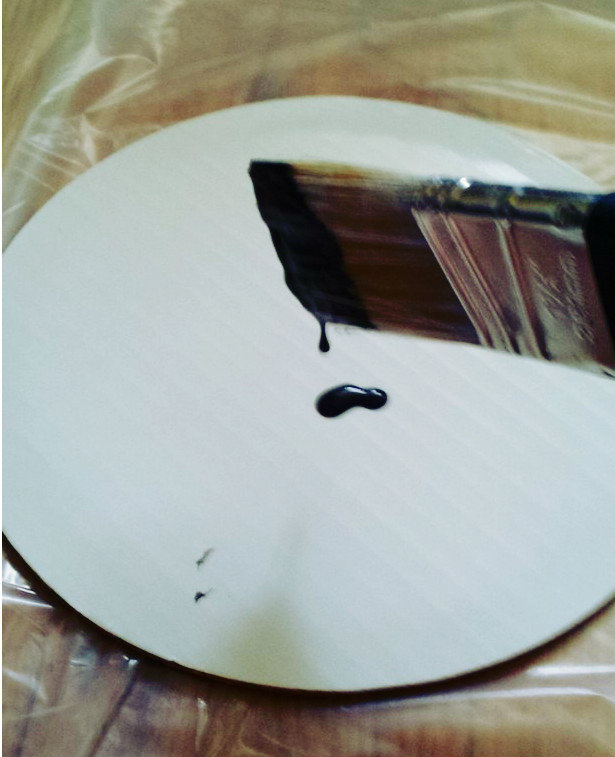
paint brush, chalkboard paint, cake circle, cake round, diy banner
 
 
Step 2: Let paint dry. If needed, put on a second coat to cover thin spots or smooth ridges.
 
Step 3: Pull out about 18 inches of twine, to allow for plenty of room when hanging your banner. Don't start too close to the end of the twine.
By Emilian Robert Vicol (Flickr: Ball-of-Hemp-Twine_31614-480x360) [CC-BY-2.0 (http://creativecommons.org/licenses/by/2.0)], via Wikimedia Commons
  Step 4: Position twine on the back side of one cake circle about 2 inches from the top. Secure with 2-3 pieces of scotch tape.
 
Step 5: Repeat with each cake circle, spacing equally as you go.
 
Step 6: Allow another 18 inches of twine at the end, and cut twine from spool.
 
Step 7: Decorate each cake circle with chalk-- your child's sidewalk chalk will make some pretty letters and pictures.
If you goof up, just erase gently with a damp paper towel and wait until completely dry before trying again.
 
owl, diy chalkboard paint banner, decoration, woodland theme
 
 
Hang and smile!
diy, banner, chalkboard, chalk, baby shower, twine, decorations, inexpensive
 
Share your chalkboard crafts with me in comments.

Shared with The 36th Avenue.
 

The 36th Avenue

Wednesday, August 14, 2013

Woodland Baby Shower

This past weekend was a great time here @ the Roberts' home! I got to play hostess to my mother's extended family for an AWESOME baby shower. We had such a great time enjoying each other's company.

Check out some of my favorite photos of the decorations...


woodland baby shower decorations


Our menu included Mexican Hot Chocolate Cupcakes, Caprese Toadstools, Sweet & Tangy Cheese Ball, Texas Caviar, & Rosemary Lemonade.


food, woodland baby shower, decorationsfood, woodland baby shower, decorations

Mommy-to-be chose a woodland theme for her nursery, and we stuck with that theme for the shower.
woodland baby shower theme decorations
 
 
I really love Hannah's dedication of Samuel to the Lord, and used it as a focal verse.
baby shower, scripture, verse, samuel, hannah, bible, child, dedication
 
This reusable banner is really easy to make and super cute!
babyshower banner, owl, chalk board, erasable, reusable, diy, craft

babyshower banner, owl, chalk board, erasable, reusable, diy, craft
 
Our guests hit the road with a little trail mix to go! We had a happy and blessed time!
baby shower, woodland, trail mix, party favor, paper bag, diy


Tuesday, July 16, 2013

5 Minute DIY Throw Pillow Covers (using Maternity Tops)

easy, tutorial, pillow covers, maternity top, diy, reuse


Guilty of saving baby clothes? Check. Guilty of saving maternity clothes? Double check.
 
Saving maternity clothes is, for me, almost just as precious as saving P's clothes.
 
No, they're not small and cute. And they don't have that great smell.
 
But they were some of the first items that were purchased because of my LO's existence. They represent the very first moments I cared for that wonderful little boy.
 
I have a lot of happy memories attached to my maternity clothes, and I bet you do too! Think about your very first maternity top, or the comfy shirt you wore all the time, or what you wore for your baby showers.
 
In a constant effort to upcycle, recycle, reuse, and refurbish-- I created a fresh look for my throw pillows using my beloved maternity tops.
 
Tutorial Starts Here
 
After washing, turn your shirt inside out, and beginning just below the arm hole, sew from one edge to the other, straight across the shirt.


Trim the excess material. Turn the shirt right side out, then place your throw pillow inside.


Measure about 1/2" below the edge of your pillow, and, using a marking pen, mark a seam line straight across your shirt. .
*I eyeballed mine, but to make sure your seam is straight, you may want to mark the seam.
 
Sew this seam with pillow inside on the right side of the shirt/cover.
 
 
Alternatively, you can sew in a zipper, button loops, Velcro, etc. for your closure. I even used fabric glue with a sweater.
 

  Finally, trim you outside seams. You'll want to be very careful, as this will be on the outside of your pillow. 
Just a quick way to give your pillows a new look!
 

Wednesday, July 10, 2013

Mirror, Mirror... on which wall?

Check out my newest completed project!


Luckily, my grandmother is a bit of a pack-rat, and her basement is a treasure chest full of great family heirlooms.

This mirror-turned-inspiration-board belonged to my great-great grandmother.
 
Two of the glass sections had been broken years ago, so I created a blackboard section and a cork board section.

I love to use heirloom pieces in my home! What heirlooms have pride-of-place in yours?


Saturday, February 23, 2013

Laundry day. And there's nothing better than clothes dried in the sun. --Piglet

I finally did it! I painted a room in my house. Having lived in parsonages for all my married life, I've never been able to do this-- until now! Here are some pics of the makeover I gave my laundry and mud room.
 
I'm a huge believer that your home should reflect YOU, when you have the ability to choose what's in it. Of course, decorating can be pricey, or in my case, often prohibited. But if you have the luxury of deciding on your home's appearance, relish it; and create a space that says who you are. You're lucky!
 
 
This is the mudroom. The door-turned-coat-rack was salvaged from my Grindiddy's parents house. This was their front door. The house was empty for about 15 years before it was burned down. I used to play house there.


The glass doorknobs are original to the doors. The outside knob was purple, and the inside knob clear. I've repurposed them as hooks.
 
This is my little "take your shoes off" nook. The basket (and it's twin on the set of drawers) are from Unclaimed Baggage in Scottsboro, about 30 minutes from where we live.
The pillow belongs to the house; it was here when we moved in, as was the ottoman.
I sewed and painted the ottoman cover.


I used chalk board paint to create a little message center above the washer & dryer.


We reattached the door plates, too.

Finishing touches :)